
Installing ShopAssist on nopCommerce
Upload the ShopAssist plugin in your nopCommerce admin and click Connect.
What you get
| Component | Description |
|---|---|
| Chat widget | A floating chat button on every page of your store. Shoppers ask about your products, and the assistant answers, recommends, and compares items. |
| Add to cart | Shoppers add products to their nopCommerce cart from the chat. They check out as usual. |
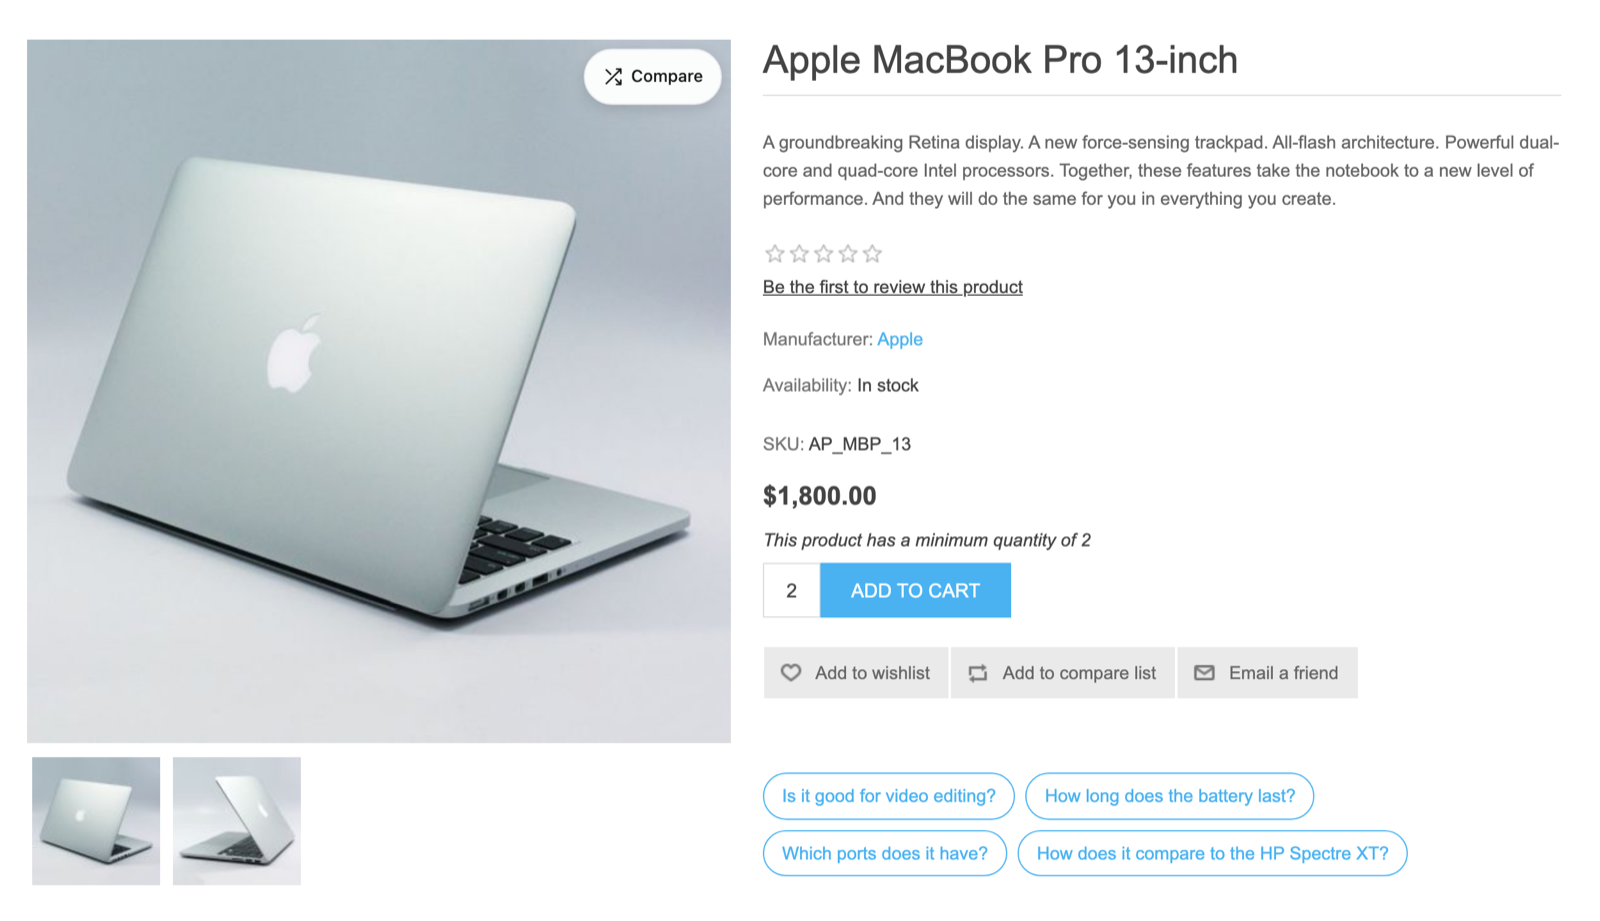
| Question pills | Questions about the product on the product page. A shopper clicks one and the chat opens with the answer. |
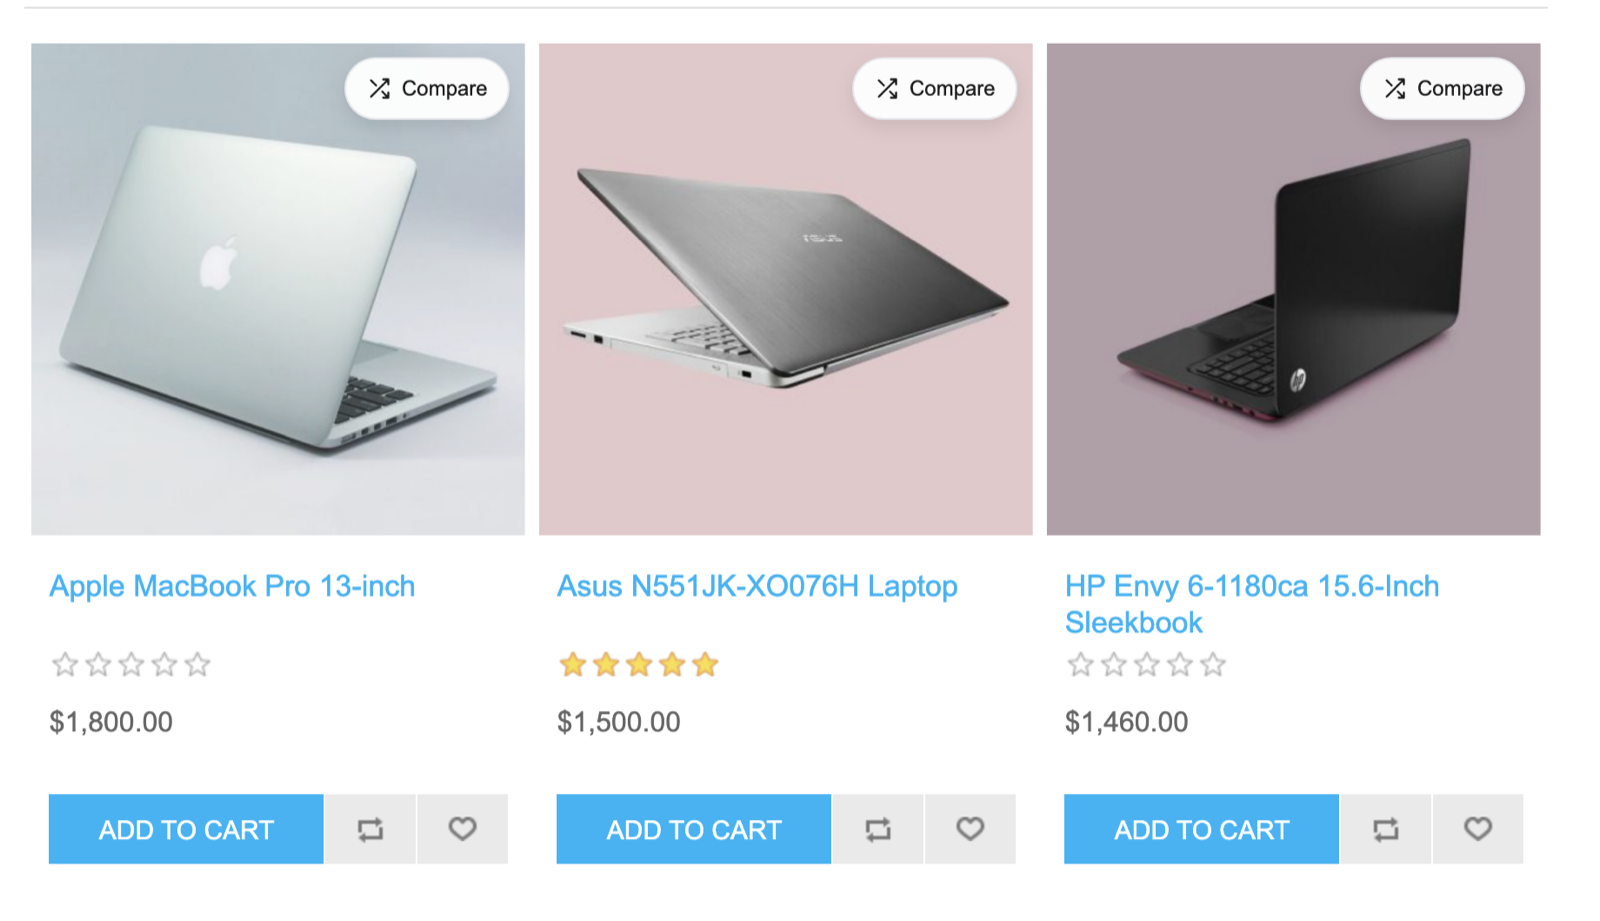
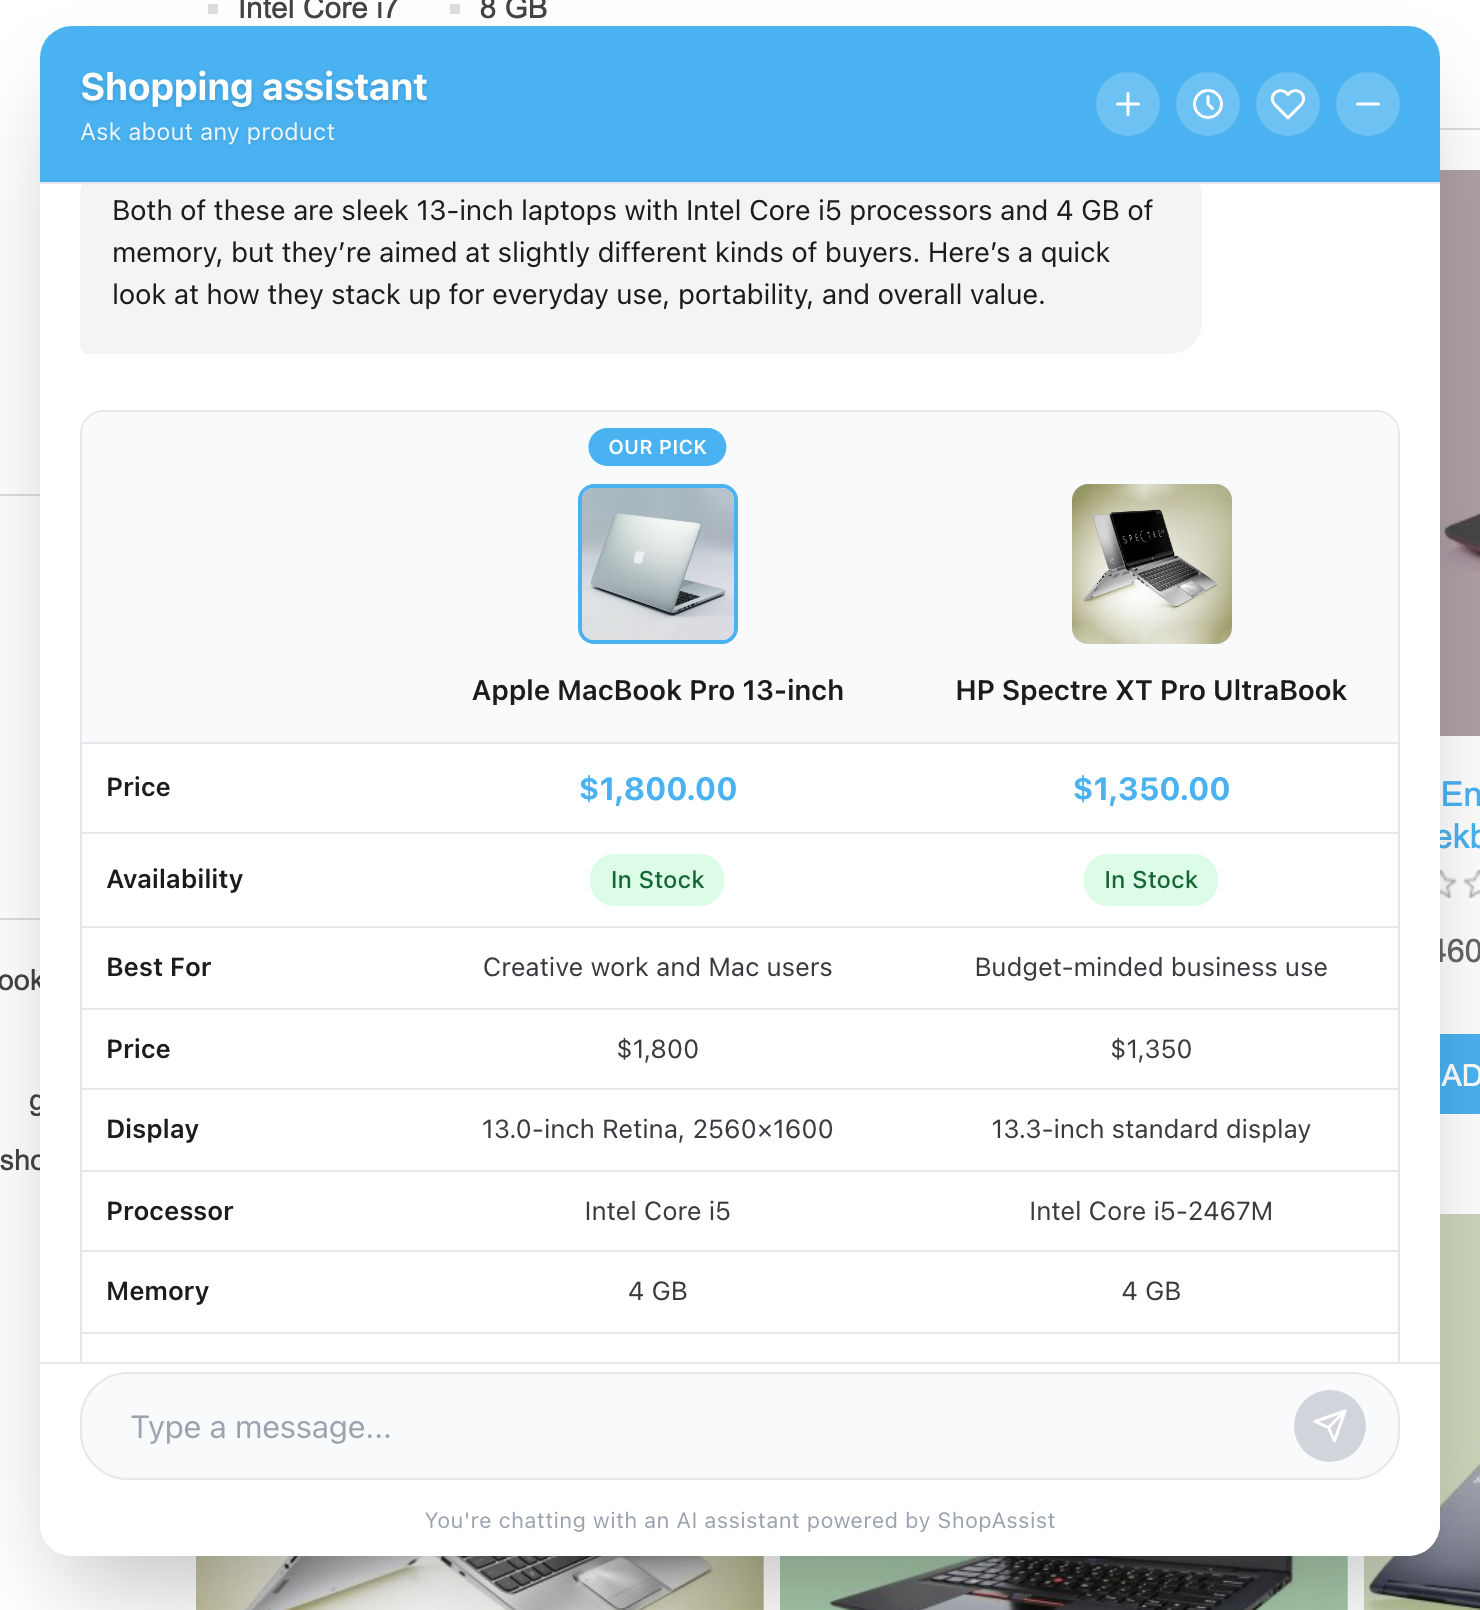
| Compare | A Compare button on the product image and on product cards in category and search results. The chat shows two products side by side. |
| Sales reporting | The orders that followed a conversation, with their revenue, in your ShopAssist dashboard. |
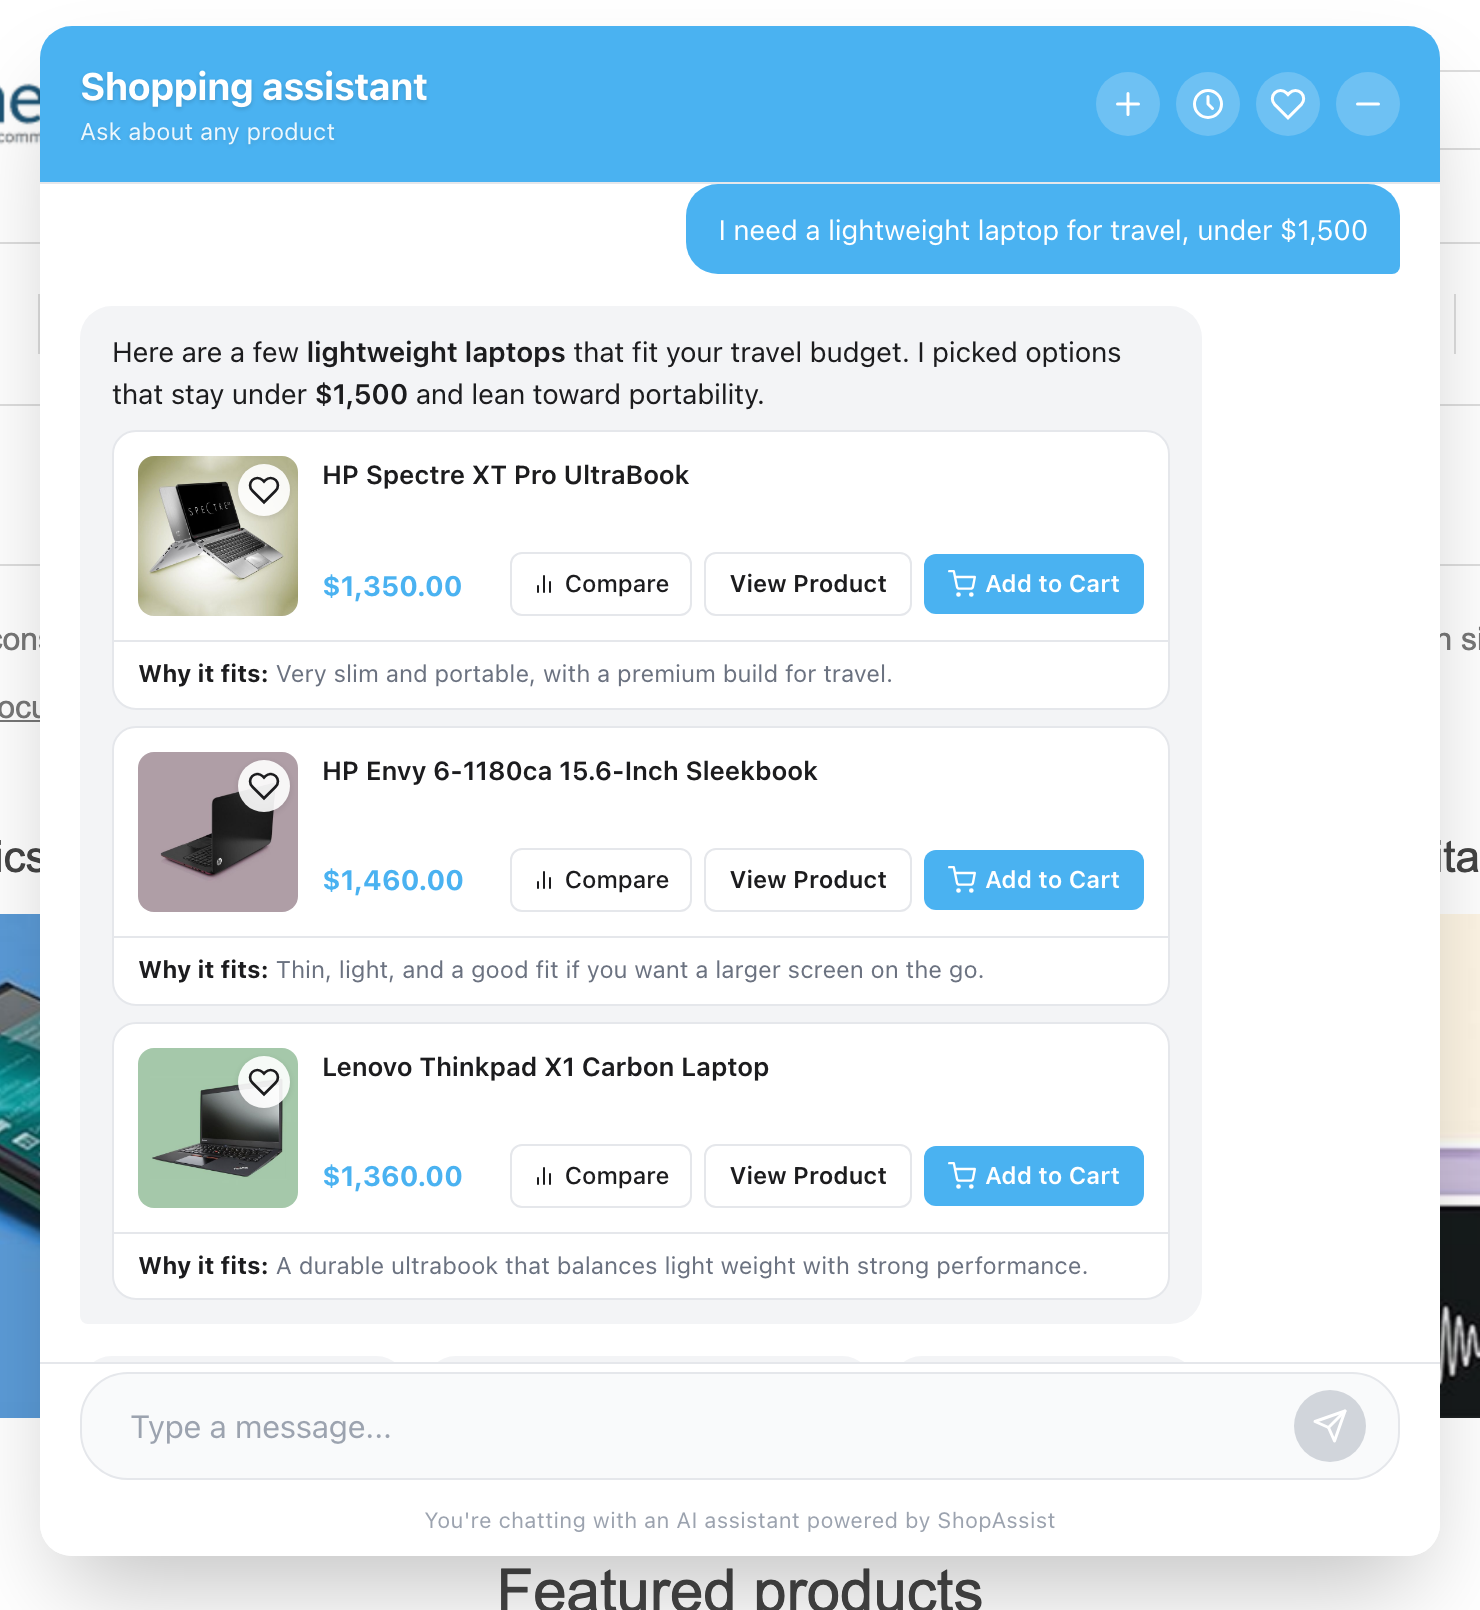
Products with a required option the chat cannot fill, such as a text field, link to their own product page, where shoppers complete the form and add them to the cart.
Before you start
- An administrator login for your nopCommerce admin.
- Your store online over HTTPS and open to visitors.
- Your public address, such as
https://www.your-store.com, under Configuration → Stores → Store URL. - A ShopAssist account. To get one, email support@getshopassist.com.
The chat button appears once ShopAssist activates your store. You can install and connect first. The button then appears on its own when your store goes live.
Plan the install outside busy hours. nopCommerce restarts twice during the install, and each restart takes your store offline for a minute or two.
1Install the plugin
- Download shopassist-nopcommerce.zip.
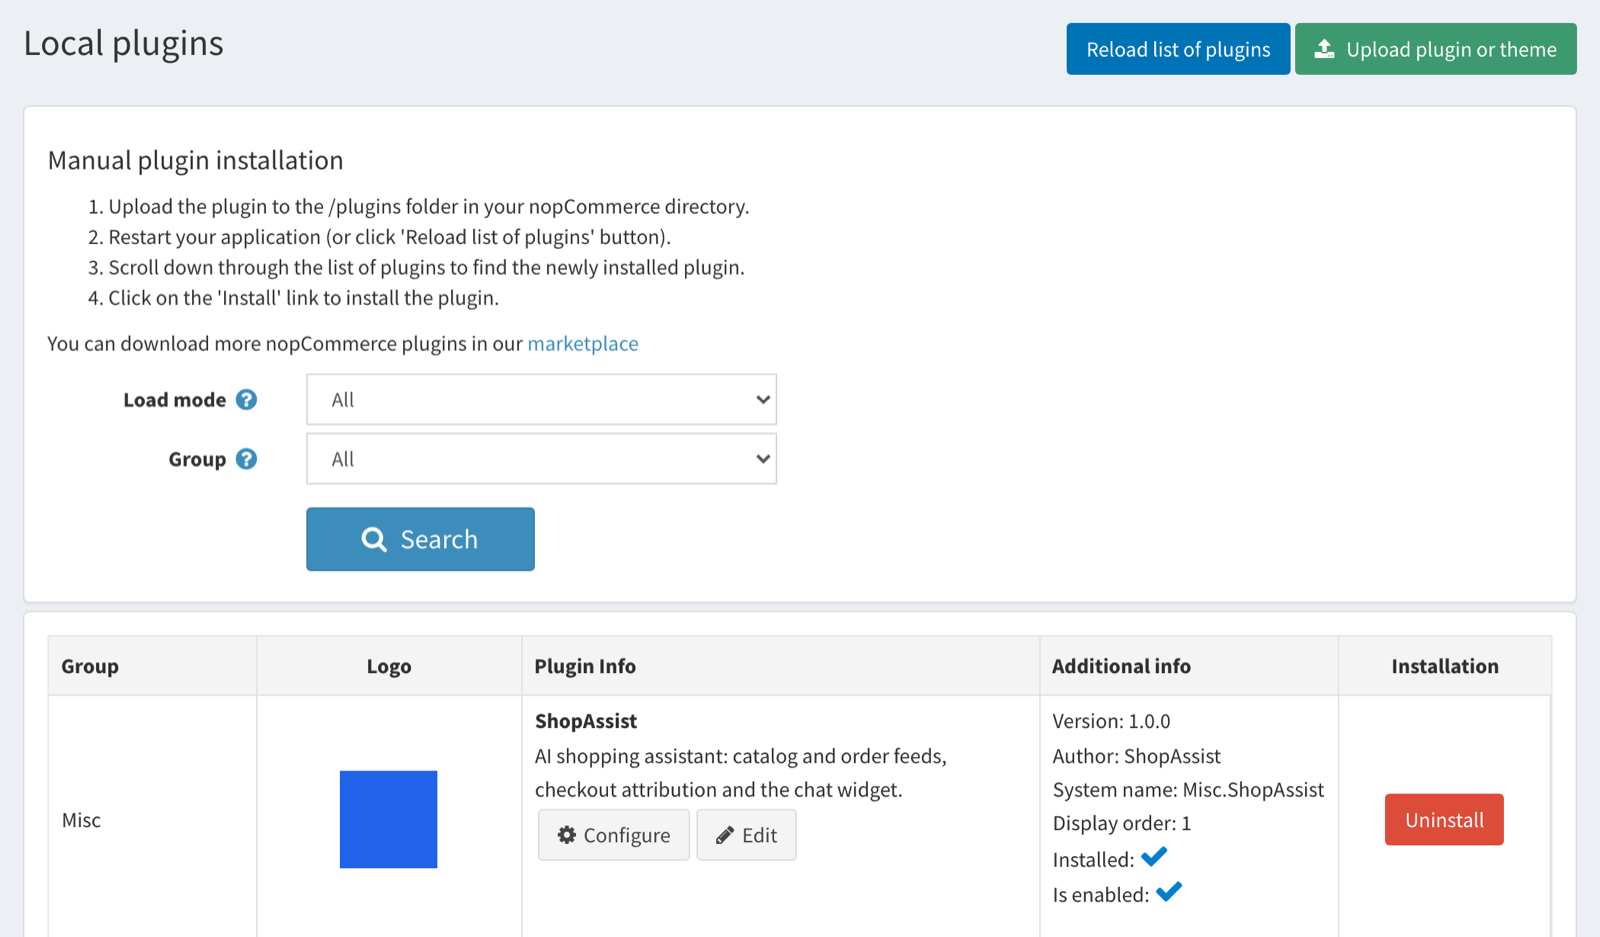
- In the nopCommerce admin, go to Configuration → Plugins → Local plugins and click Upload plugin or theme at the top right.
- Choose
shopassist-nopcommerce.zipand upload it. - Click Restart application. nopCommerce shows a new plugin only after a restart.
- Find ShopAssist in the list and click Install.
- Click Restart application again.
2Connect
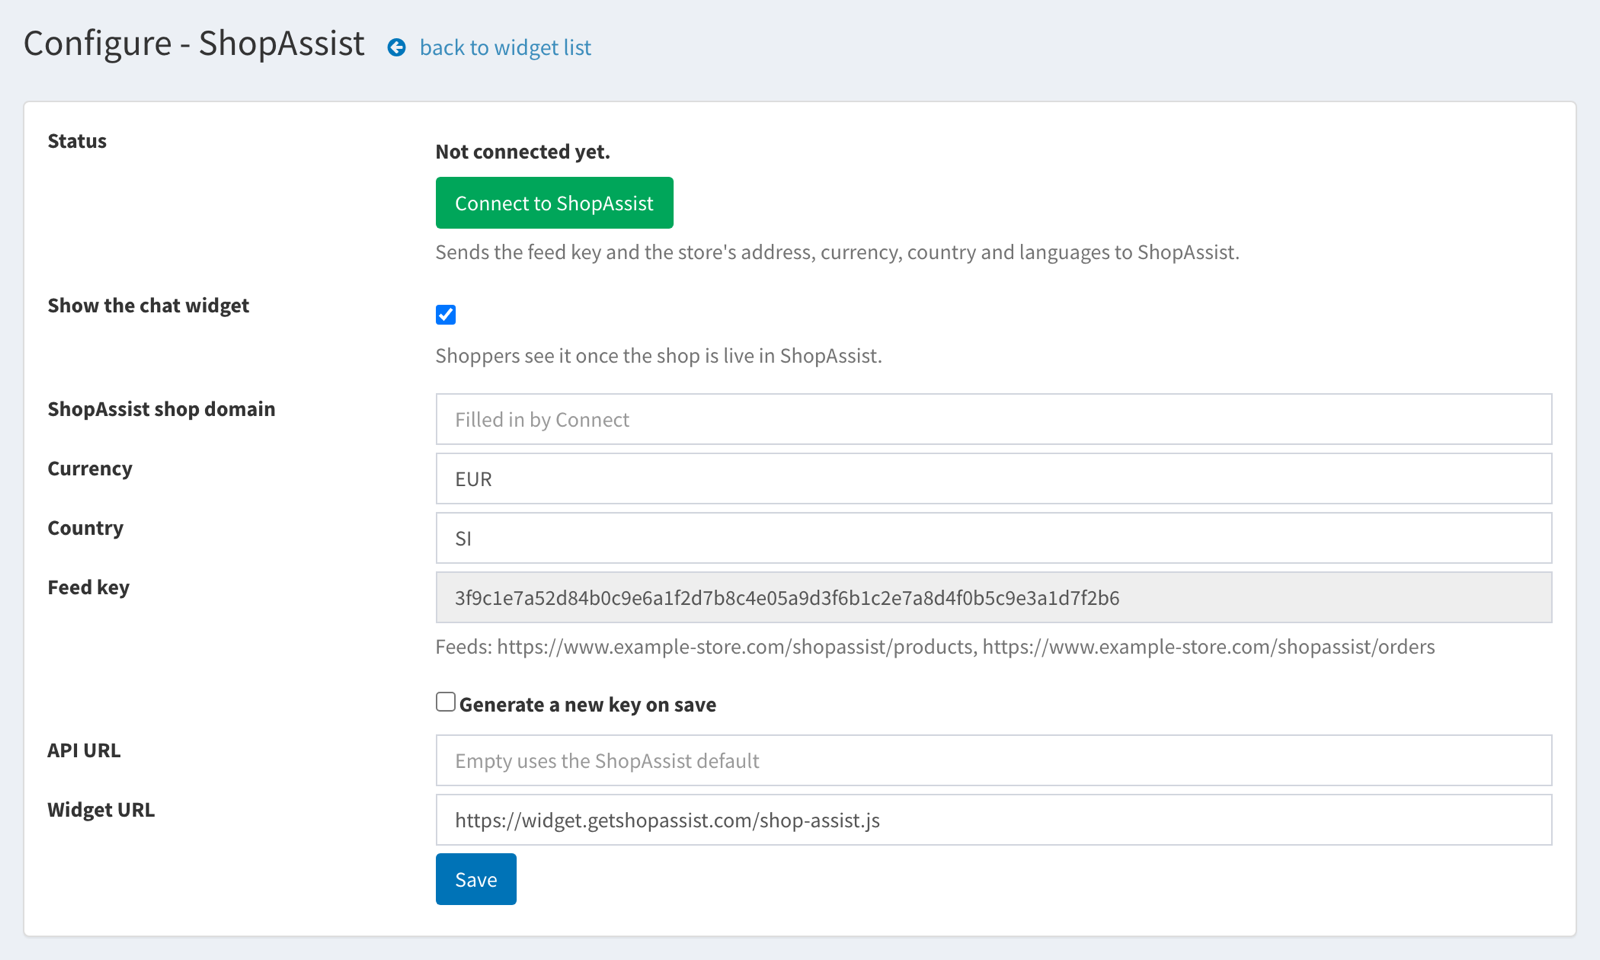
- Click Configure on the ShopAssist row.
- Check Currency and Country, for example
EURandSI. The install fills them from your store. - Click Connect to ShopAssist.
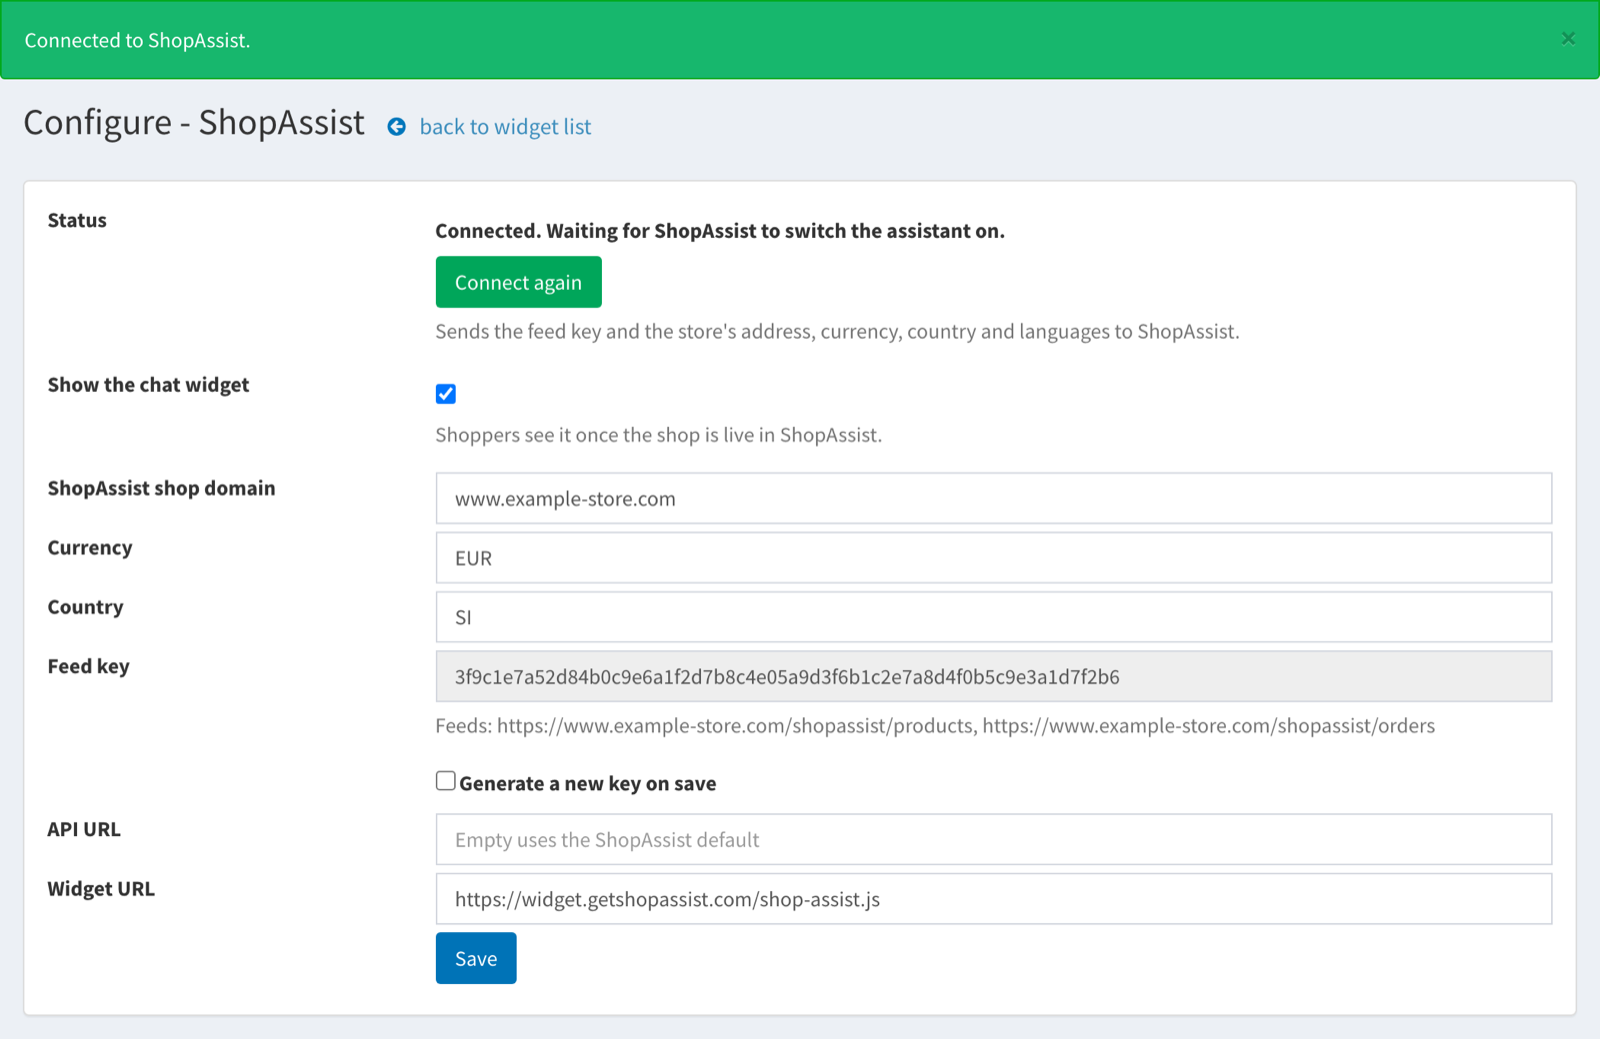
The plugin sends ShopAssist a read-only key for your catalog and orders, with your store address, currency, country and languages. A green message confirms the connection, and the plugin fills in ShopAssist shop domain.
ShopAssist never receives customer names, email addresses or postal addresses. The order data it reads is the order total, the items and the status.
3Check it works
The top of the ShopAssist settings page shows where you are:
| Status | Next step |
|---|---|
| Not connected yet. | Click Connect to ShopAssist. |
| Connected. Waiting for ShopAssist to switch the assistant on. | ShopAssist activates your store. The chat button then appears on its own. |
| Connected and live. | The assistant is on your store. |
When the status says Connected and live:
- Open your store in a new browser tab.
- Wait about five seconds.
- Look for a round chat button in the bottom corner.
- Click it and ask something, such as What do you sell?
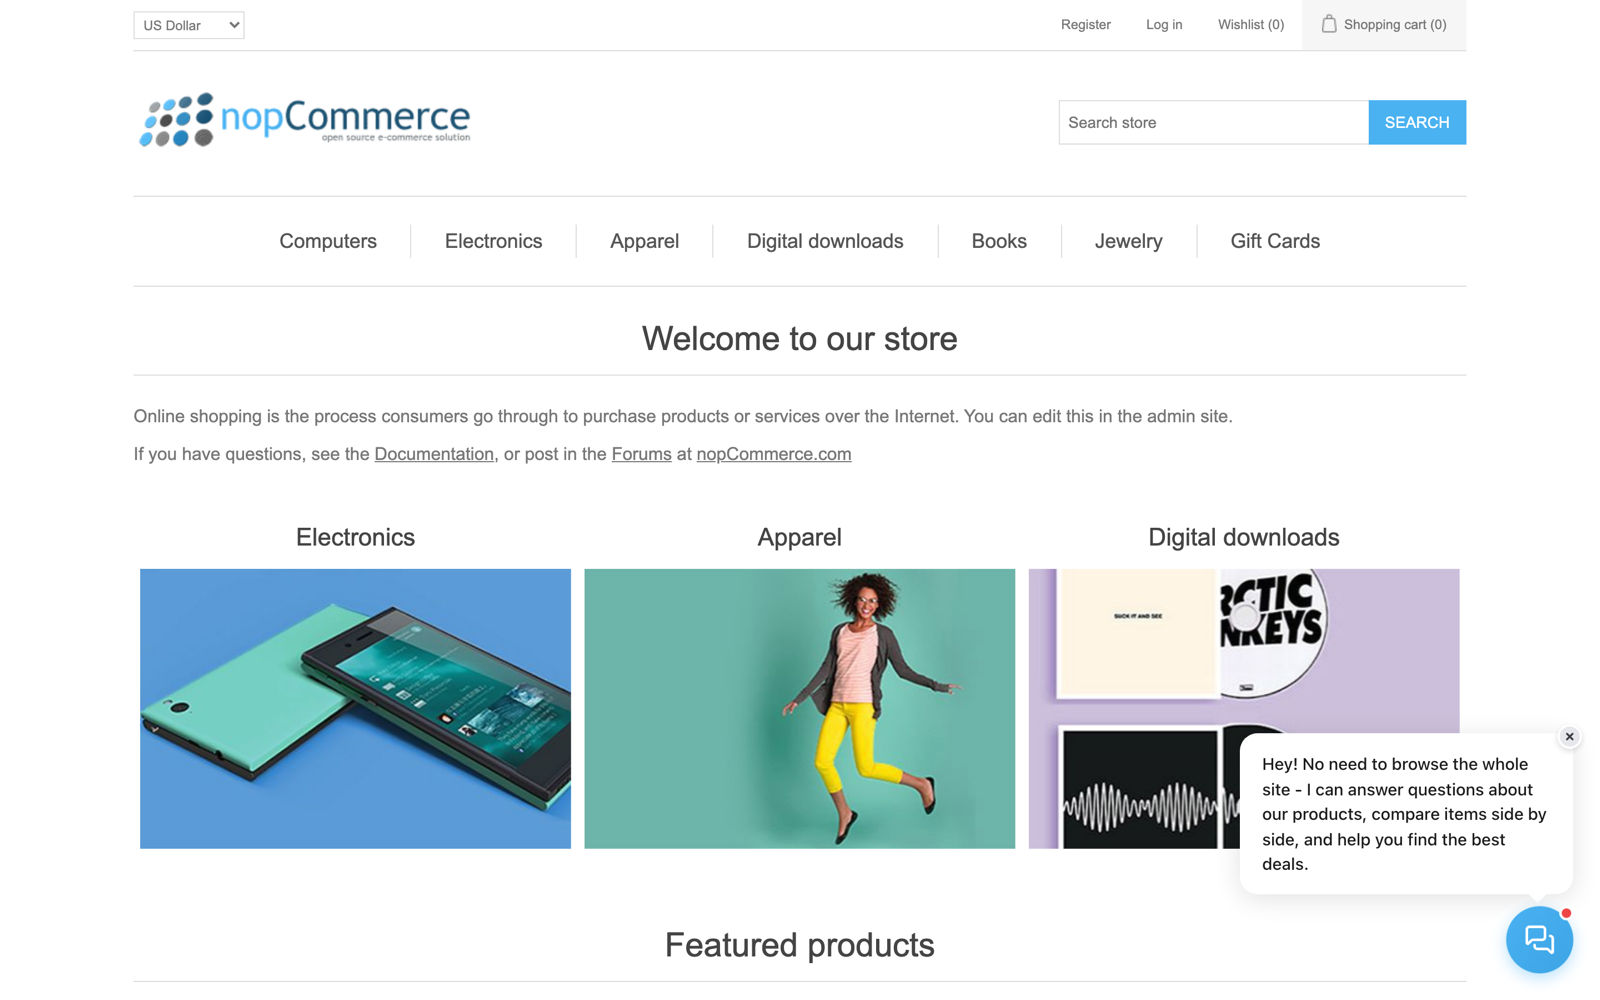
You are done when the assistant answers with products from your catalog.
On a product page, a Compare button sits on the product image. Products with questions in your ShopAssist dashboard also show them under the add-to-cart button.
On a category page, each product card has a Compare button. Click it on two products, and the chat shows them side by side.
Settings
| Setting | What it does |
|---|---|
| Show the chat widget | Shows or hides the whole assistant on your store, including the questions and the Compare buttons. On after the install. |
| Currency, Country | Your store’s currency and country. Click Connect again after a change. |
| Generate a new key on save | Replaces the key ShopAssist uses to read your catalog. Click Connect again afterwards. |
| API URL, Widget URL | Leave these as they are unless ShopAssist support asks you to change them. |
The chat uses the language of each page, so a store with several languages works with one install. Click Save after a change.
Pausing and removing
To pause: untick Show the chat widget and click Save. The chat button disappears at the next page load. Your account, settings and past conversations stay as they are.
To remove: in Configuration → Plugins → Local plugins, click Uninstall on the ShopAssist row, then Restart application. The plugin also deletes its key, so ShopAssist can no longer read your catalog.
Troubleshooting
| What you see | What to do |
|---|---|
| ShopAssist is not in the plugin list after the upload | Click Restart application. |
| “ShopAssist could not read your catalog feed at …” | Check that Configuration → Stores → Store URL is your public https:// address, and that the store restarted after the install. Then click Connect to ShopAssist again. |
| “ShopAssist could not reach your store at …” | Make your store reachable over HTTPS, including the /shopassist/ addresses, then click Connect to ShopAssist again. |
| “Your bot protection blocked ShopAssist” | Email us with the name of your firewall or bot protection service. |
| “ShopAssist is unreachable right now” | Allow your server to make outgoing HTTPS requests to api.getshopassist.com. |
| The chat button is missing | Check the status at the top of the settings page, and that Show the chat widget is ticked. A status of Waiting means ShopAssist is activating your store. |
| A product page shows no questions | Add questions for the product in your ShopAssist dashboard. |
For help, email support@getshopassist.com with the step you reached, the message you saw, and the address of your store.